Blogging with Jekyll on Windows

So! Time to write my first blog. Something simple first, guess I need a few posts to get into this. Judging by the amount of blogs, I’m probably not the first one starting out and probably won’t be the last so I thought I’d share what I did to set up this blog.
First up, I did what I always do when I’m unsure how to solve a problem: Google it! Loads of articles, many about WordPress. But I want something different and even more important, I wanted something I trusted and for things to be simple.
What I ended up choosing, was a Jekyll blog on GitHub: well known to us developers, pretty easy to set up as you’ll see below, no costs, near any GIT repositories I might refer to and last bit not least, a bit of nerding involved. For those who don’t know, Jekyll is a static site generator and the integration with GitHub is great.
Mostly I followed instructions and a few guides on the internet, which I’ll refer to in the end, but here’s the summary. Btw, I assume you have knowledge of GIT and how to use it, if you don’t have a look at one of these pages:
Step by step instructions:
-
We’ll start by creating a GitHub account. Remember the username, you’ll need it in the next step.
-
Create a Git repository named “yourusername.github.io”. Afterwards, if you head to
https://github.com/username/username.github.io/settingsand scroll down to “GitHub pages” it should look like this: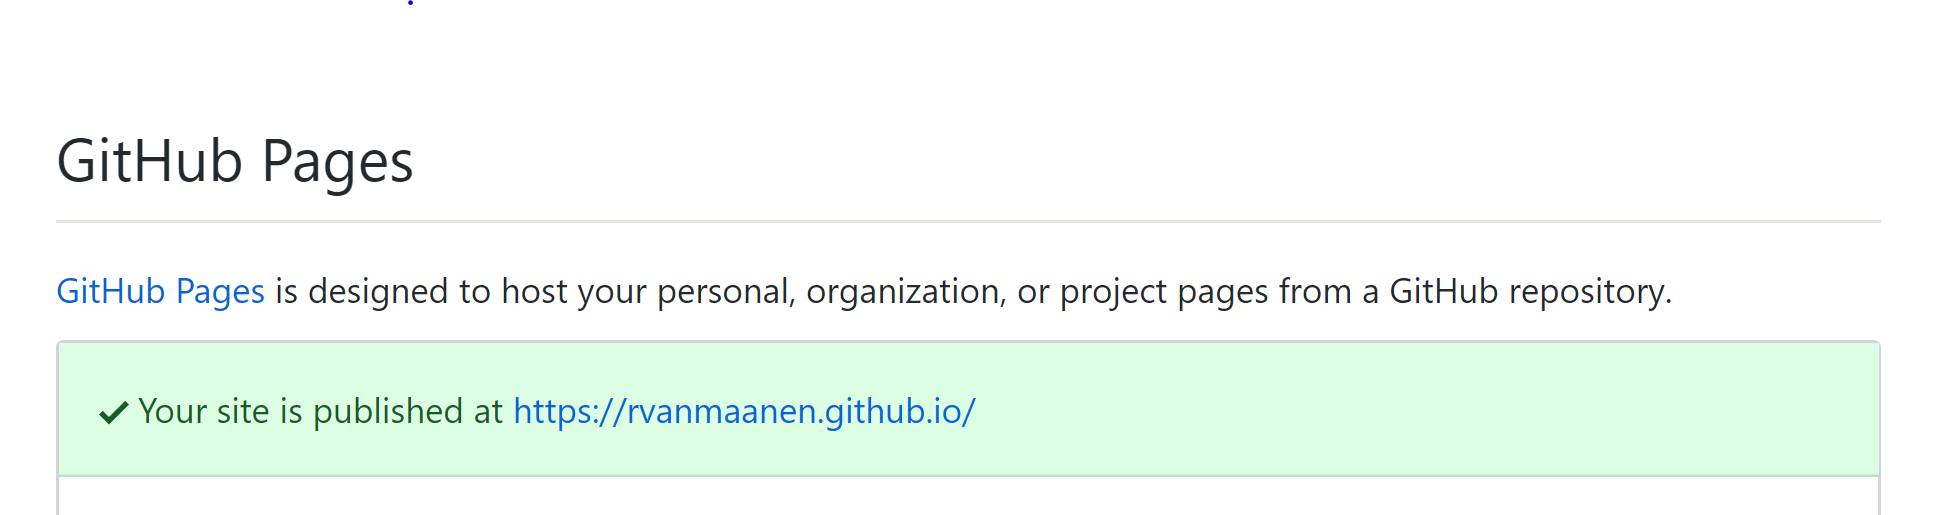 .
.
You can actually stop here and just use GitHub Pages by pushing HTML files to your GIT repository. As I wanted something more fancy, I continued. - Next we’ll setup Jekyll locally. Here I just dove in headfirst, and started fixing the requirements listed by Jekyll. As I was about to Google how to install GCC and Make I realized I was probably doing something wrong and things should be easier. And guess what, on my Windows 10 with the Anniversary Update, things can be a lot easier by using a new feature called WSL, or Windows Subsystem for Linux. Enabling this is pretty straightforward:
- Open your start menu.
- Type in OptionalFeatures.exe and press enter.
- Mark the checkbox next to “Windows Subsystem for Linux” and press ok.
- Finish the installation and reboot when asked.
-
One more thing before actually starting with Jekyll is installing Ubuntu from the Windows Store. Afterwards, you have Bash on Windows! Pretty awesome :)
-
As I just followed the guide from Jekyll at this point (which just states that you must have Bash on Ubuntu on Windows enabled and doesn’t explain how – hence steps 3 and 4), here it is. As you’ll see, Windows isn’t officially supported, but it works fine on my machine ;)
-
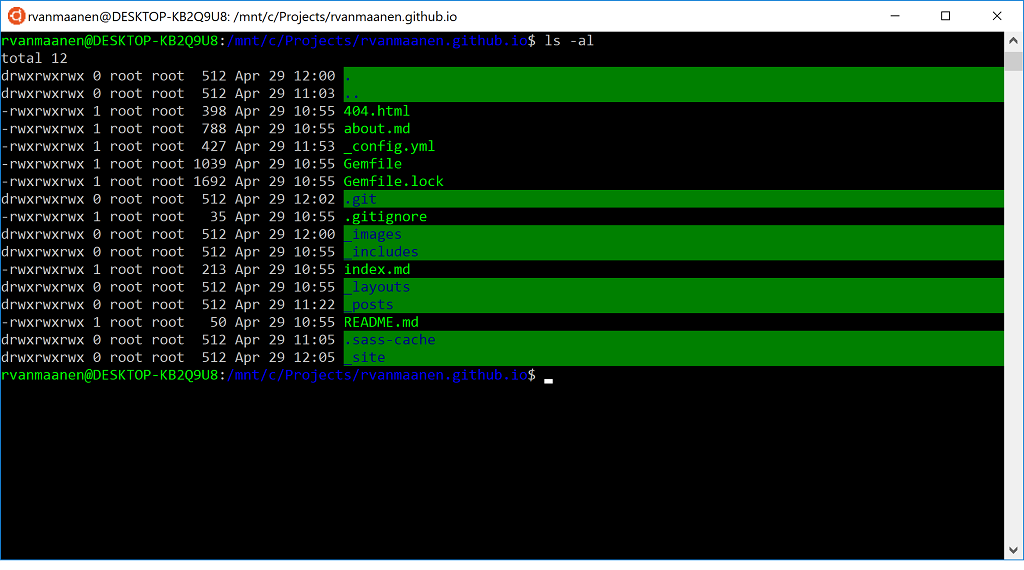
Next we’ll clone the GIT repo we created earlier:
git clone https://github.com/rvanmaanen/rvanmaanen.github.io.gitin my case. I did this in the directory/mnt/c/Projects, so I can access the files from Windows as well without using Ubuntu. All your drives are mounted here by default, so this directory is the same asC:\Projects. GIT is available by default in Ubuntu, so no need to install anything. -
From the directory containing your GIT repo (again, that would be
/mnt/c/Projects/rvanmaanen.github.ioin my case), execute the commandjekyll new ., which creates a new blog in your current directory. -
Staying in the same directory, run the command
jekyll serveto spin up a temporary webserver so you can view your blog locally -
If everything is working as expected, you can start tracking all the files with GIT, commit them and then push your changes to your remote, before making any more changes. After a few minutes you should see your blog live at
https://username.github.io. -
Have a look at the _config.yml for settings for your blog, like any usernames for your social media, a description, the title and more. I wouldn’t recommend changing the theme at this time, more on that later.
-
Startup the local webserver again to view your blog, so you can see what your doing in the next steps. Remove the dummy blogpost in the _posts directory and create a new file following the same naming convention (year-month-day-title.md):
2018-04-29-Blogging-with-Jekyll-on-Windows.md. If you refresh your blog you should see the changes immediately. I use Notepad++ for this. -
To provide a title and give your post a nice layout, place the following in the top of your markdown file:
---
layout: post
title: “Blogging with Jekyll on Windows”
categories: jekyll windows
--- - Start writing, use
jekyll serveoften to see the results and push your changes to GitHub when you’re ready. These are just the basics, there is a lot you can do with markdown files and Jekyll.